
Installing Kali Linux on Windows 8 Hyper-V (Windows 8.1 includes improvements to the Hyper-V platform)
Installing Hyper-V:
- Requirement: Windows 8 Pro or Windows 8 Enterprise which include Client Hyper-V.
- Requirement: Your computer processor must support virtualization technology (VT), though most processors in the past 5 years support VT (pretty much all Intel i-series processors, i3, i5, i7).
- Enable virtualization technology (VT) on your computer’s processor by editing the BIOS settings at boot-up (many computer BIOS have VT disabled).
- Open the Start Screen, also referred to as Metro, (press the Windows Key) and search for “Windows Feature”. Open “Turn Windows Features on or off” and scroll down to “Hyper-V”.
- Expand and Check the box next to Hyper-V. Ensure there is a check box. If there isn’t, visualization technology, you won’t be able to check the box and enable install of “Hyper-V Platform”.
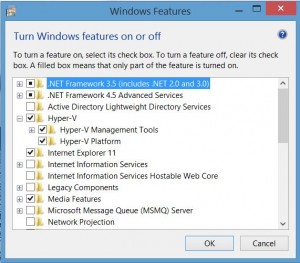
- Restart the computer when prompted.

Installing Kali Linux in a Hyper-V VM.
- Ensure the latest version of Kali Linux ISO (Kali Linux 64 bit ISO) is on a local storage device (hard drive, USB drive, etc).
- Open the Hyper-V Manager.
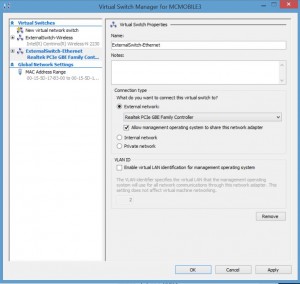
- Create a new Virtual Switch by opening “Virtual Switch Manager” to enable VM networking.
- On the right pane (Action), Click New, Virtual Machine.
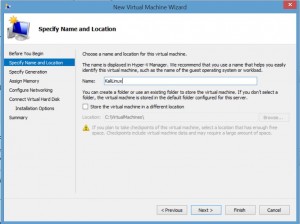
- Type a name for the VM (kali) and click Next.
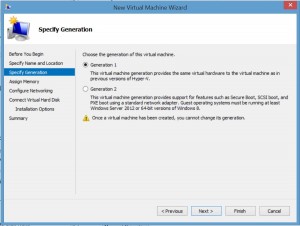
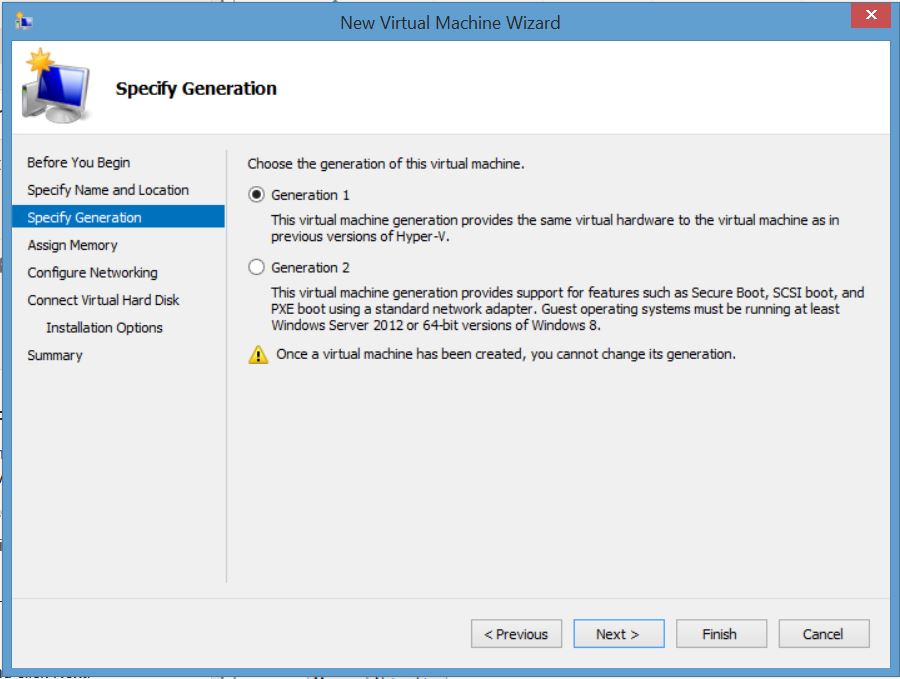
- Select “Generation 1” and click Next.
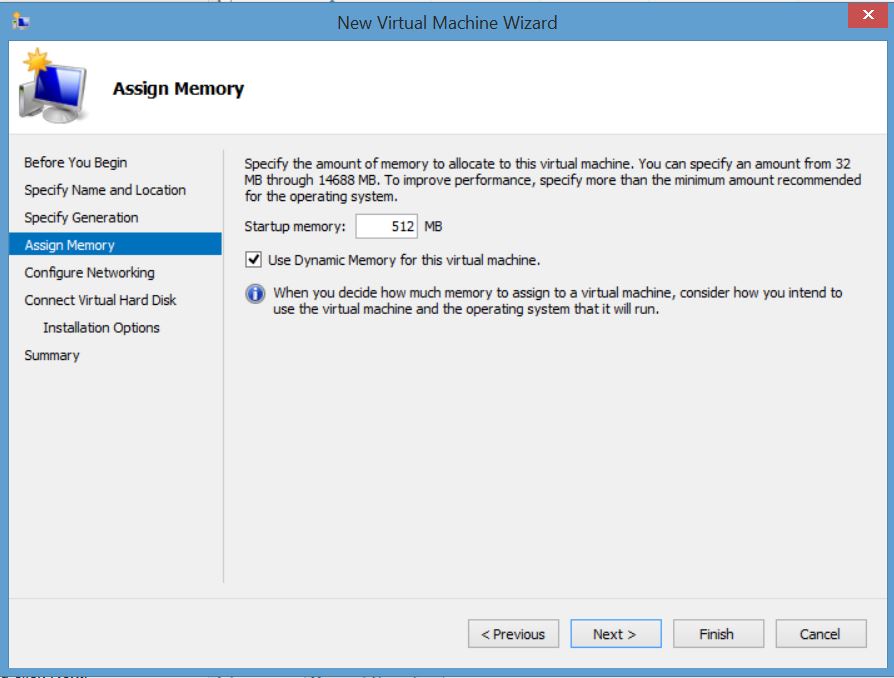
- Either keep the default for Startup Memory (512MB) or change to 1024 (MB). Check Dynamic Memory if you want the Kali Linux VM to have access to additional memory when needed. Click Next.

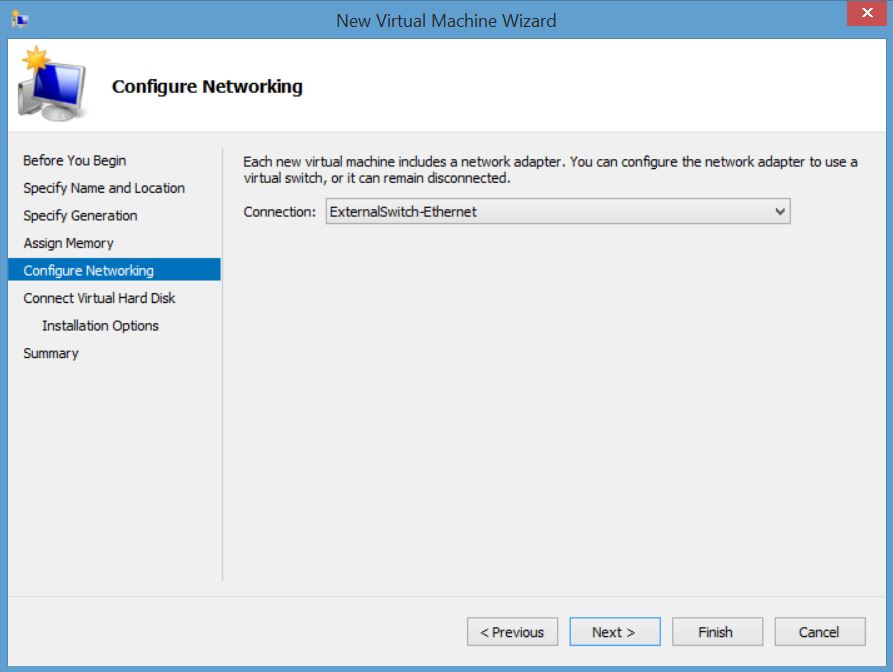
- Select the virtual NIC you created in the second step from the drop down list next to Connection. If you don’t have an option here, go back and configure a new virtual NIC. Click Next.

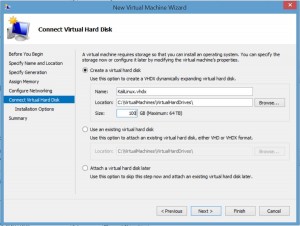
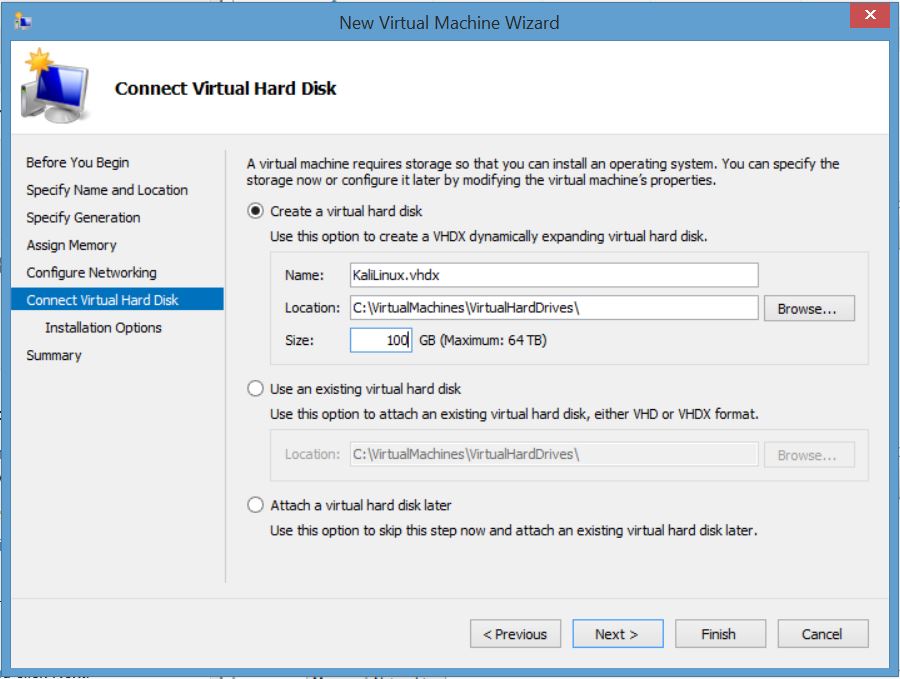
- For the Virtual Hard Disk, select the default or change the size of the disk (127GB by default). It dynamically expands as needed, so make it as large as you think you will need. Click Next.
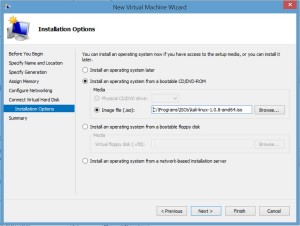
- Select “Install an operating system from a bootable CD/DVD-ROM”, select “Image file (.iso)” and select Browse to select the Kali Linux ISO provided in step 1. Click Next.
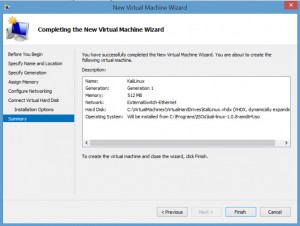
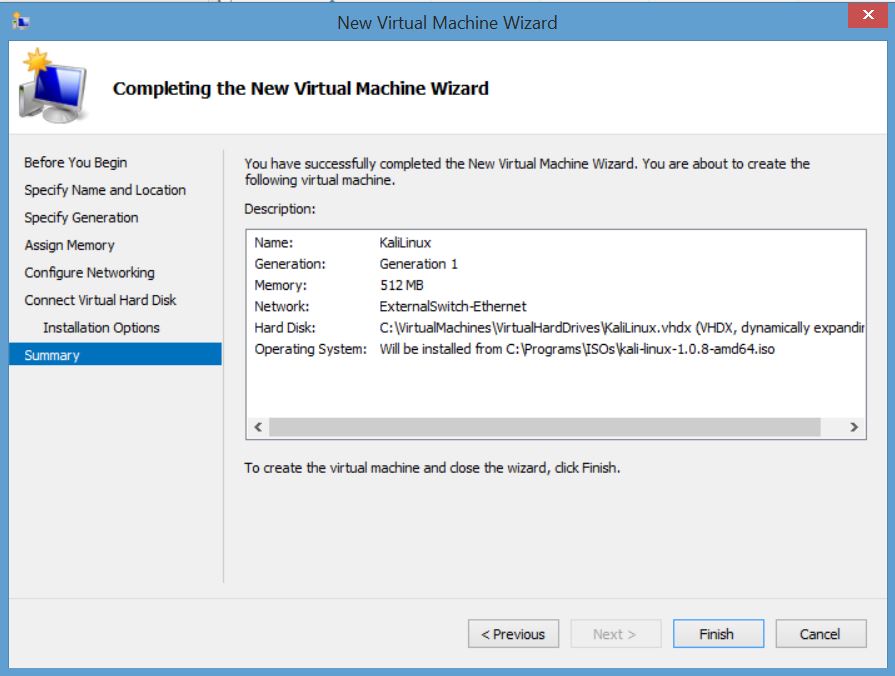
- Click Finish.
- Double-Click on the new VM and click start. The Kali Linux installer should start. Select Install.
- Follow the Kali Linux install prompts to install.


I have also had success with disabling all of the Integration services or running one of the Kali Live options.
(Visited 19,635 times, 1 visits today)
Recent Comments